SAML Single Sign-On (SSO)
Let your team log in to Straion through your company’s identity provider (IdP) instead of managing separate passwords. Straion speaks standard SAML 2.0 and works with Okta, Microsoft Entra ID (formerly Azure AD), OneLogin, Google Workspace, JumpCloud, PingOne — any provider that implements the standard.
Setting up SSO takes about ten minutes and has two halves:
- In your IdP — create a SAML application that points at Straion.
- In Straion — paste the IdP’s metadata to create the connection.
What you’ll need
You must be an organization admin in Straion. Open Identity & provisioning from the organization menu (click your organization name in the top-left corner). The page shows the two values every IdP setup asks for:
- Single sign-on URL (also called ACS URL, Reply URL, or Consumer URL)
- Audience URI (also called SP Entity ID or Identifier)
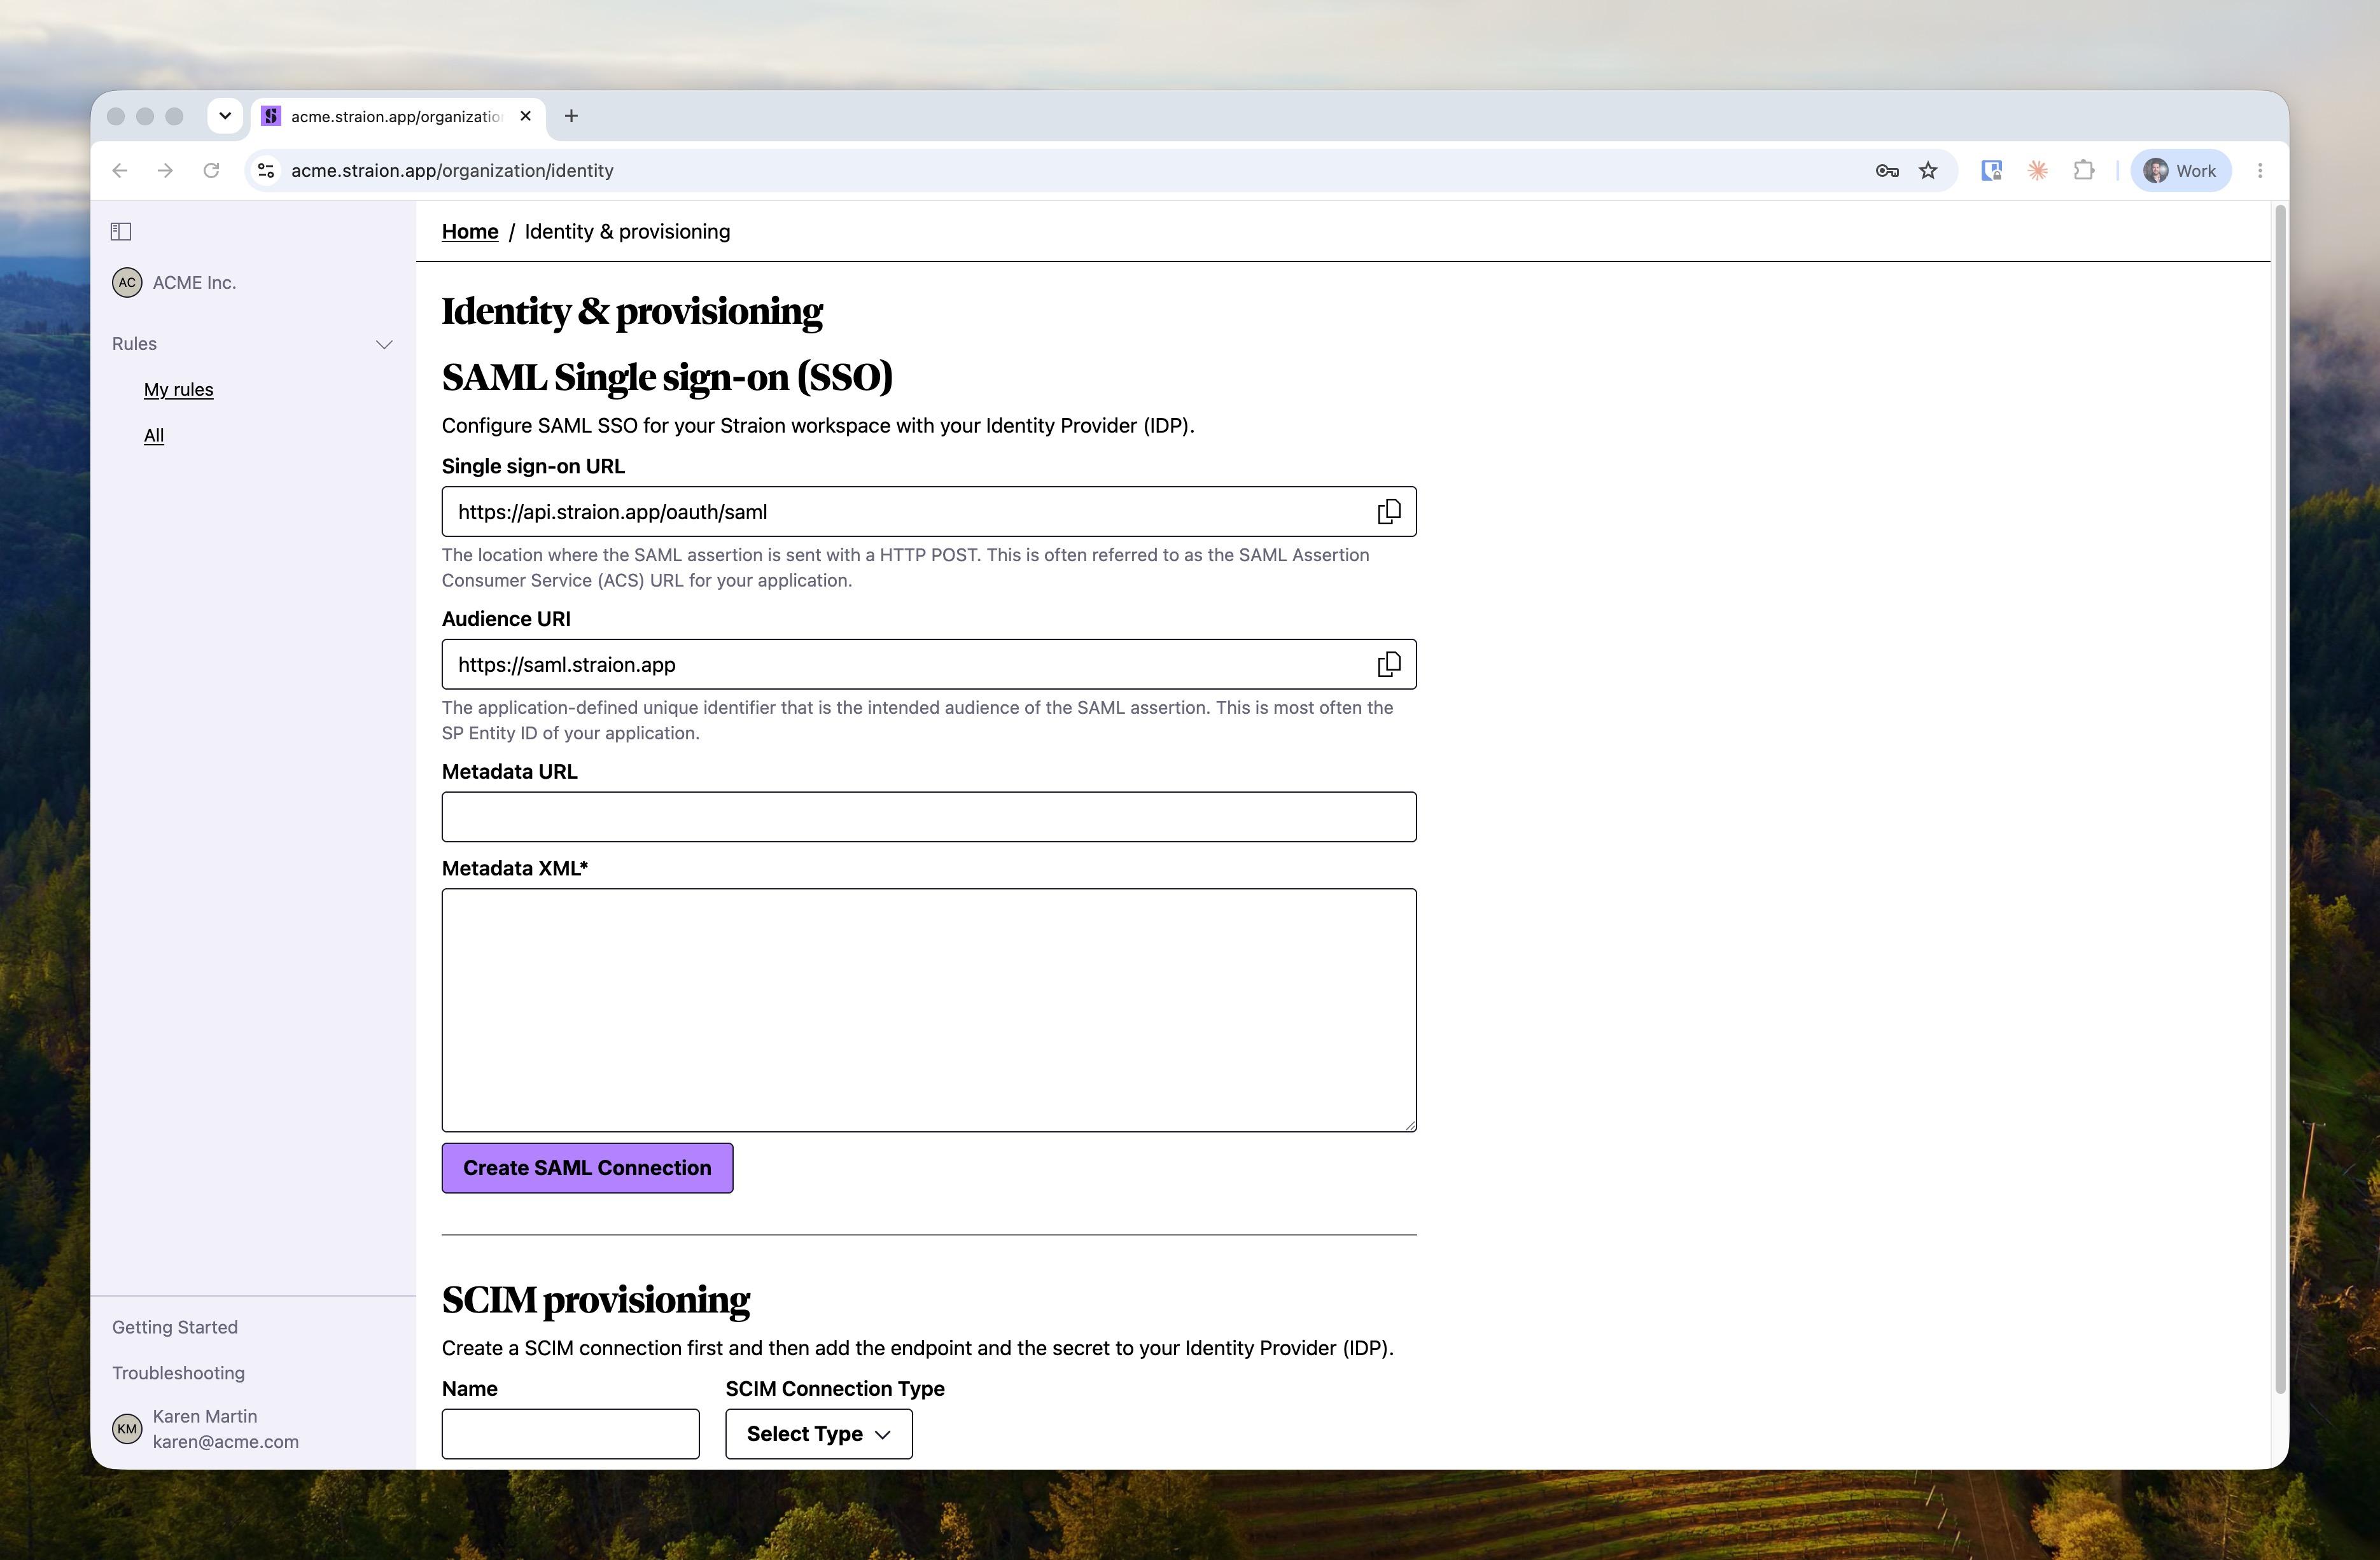
Keep this page open — you’ll copy these two values into your IdP, and bring the IdP’s metadata back here.
Okta
1. Create the app integration
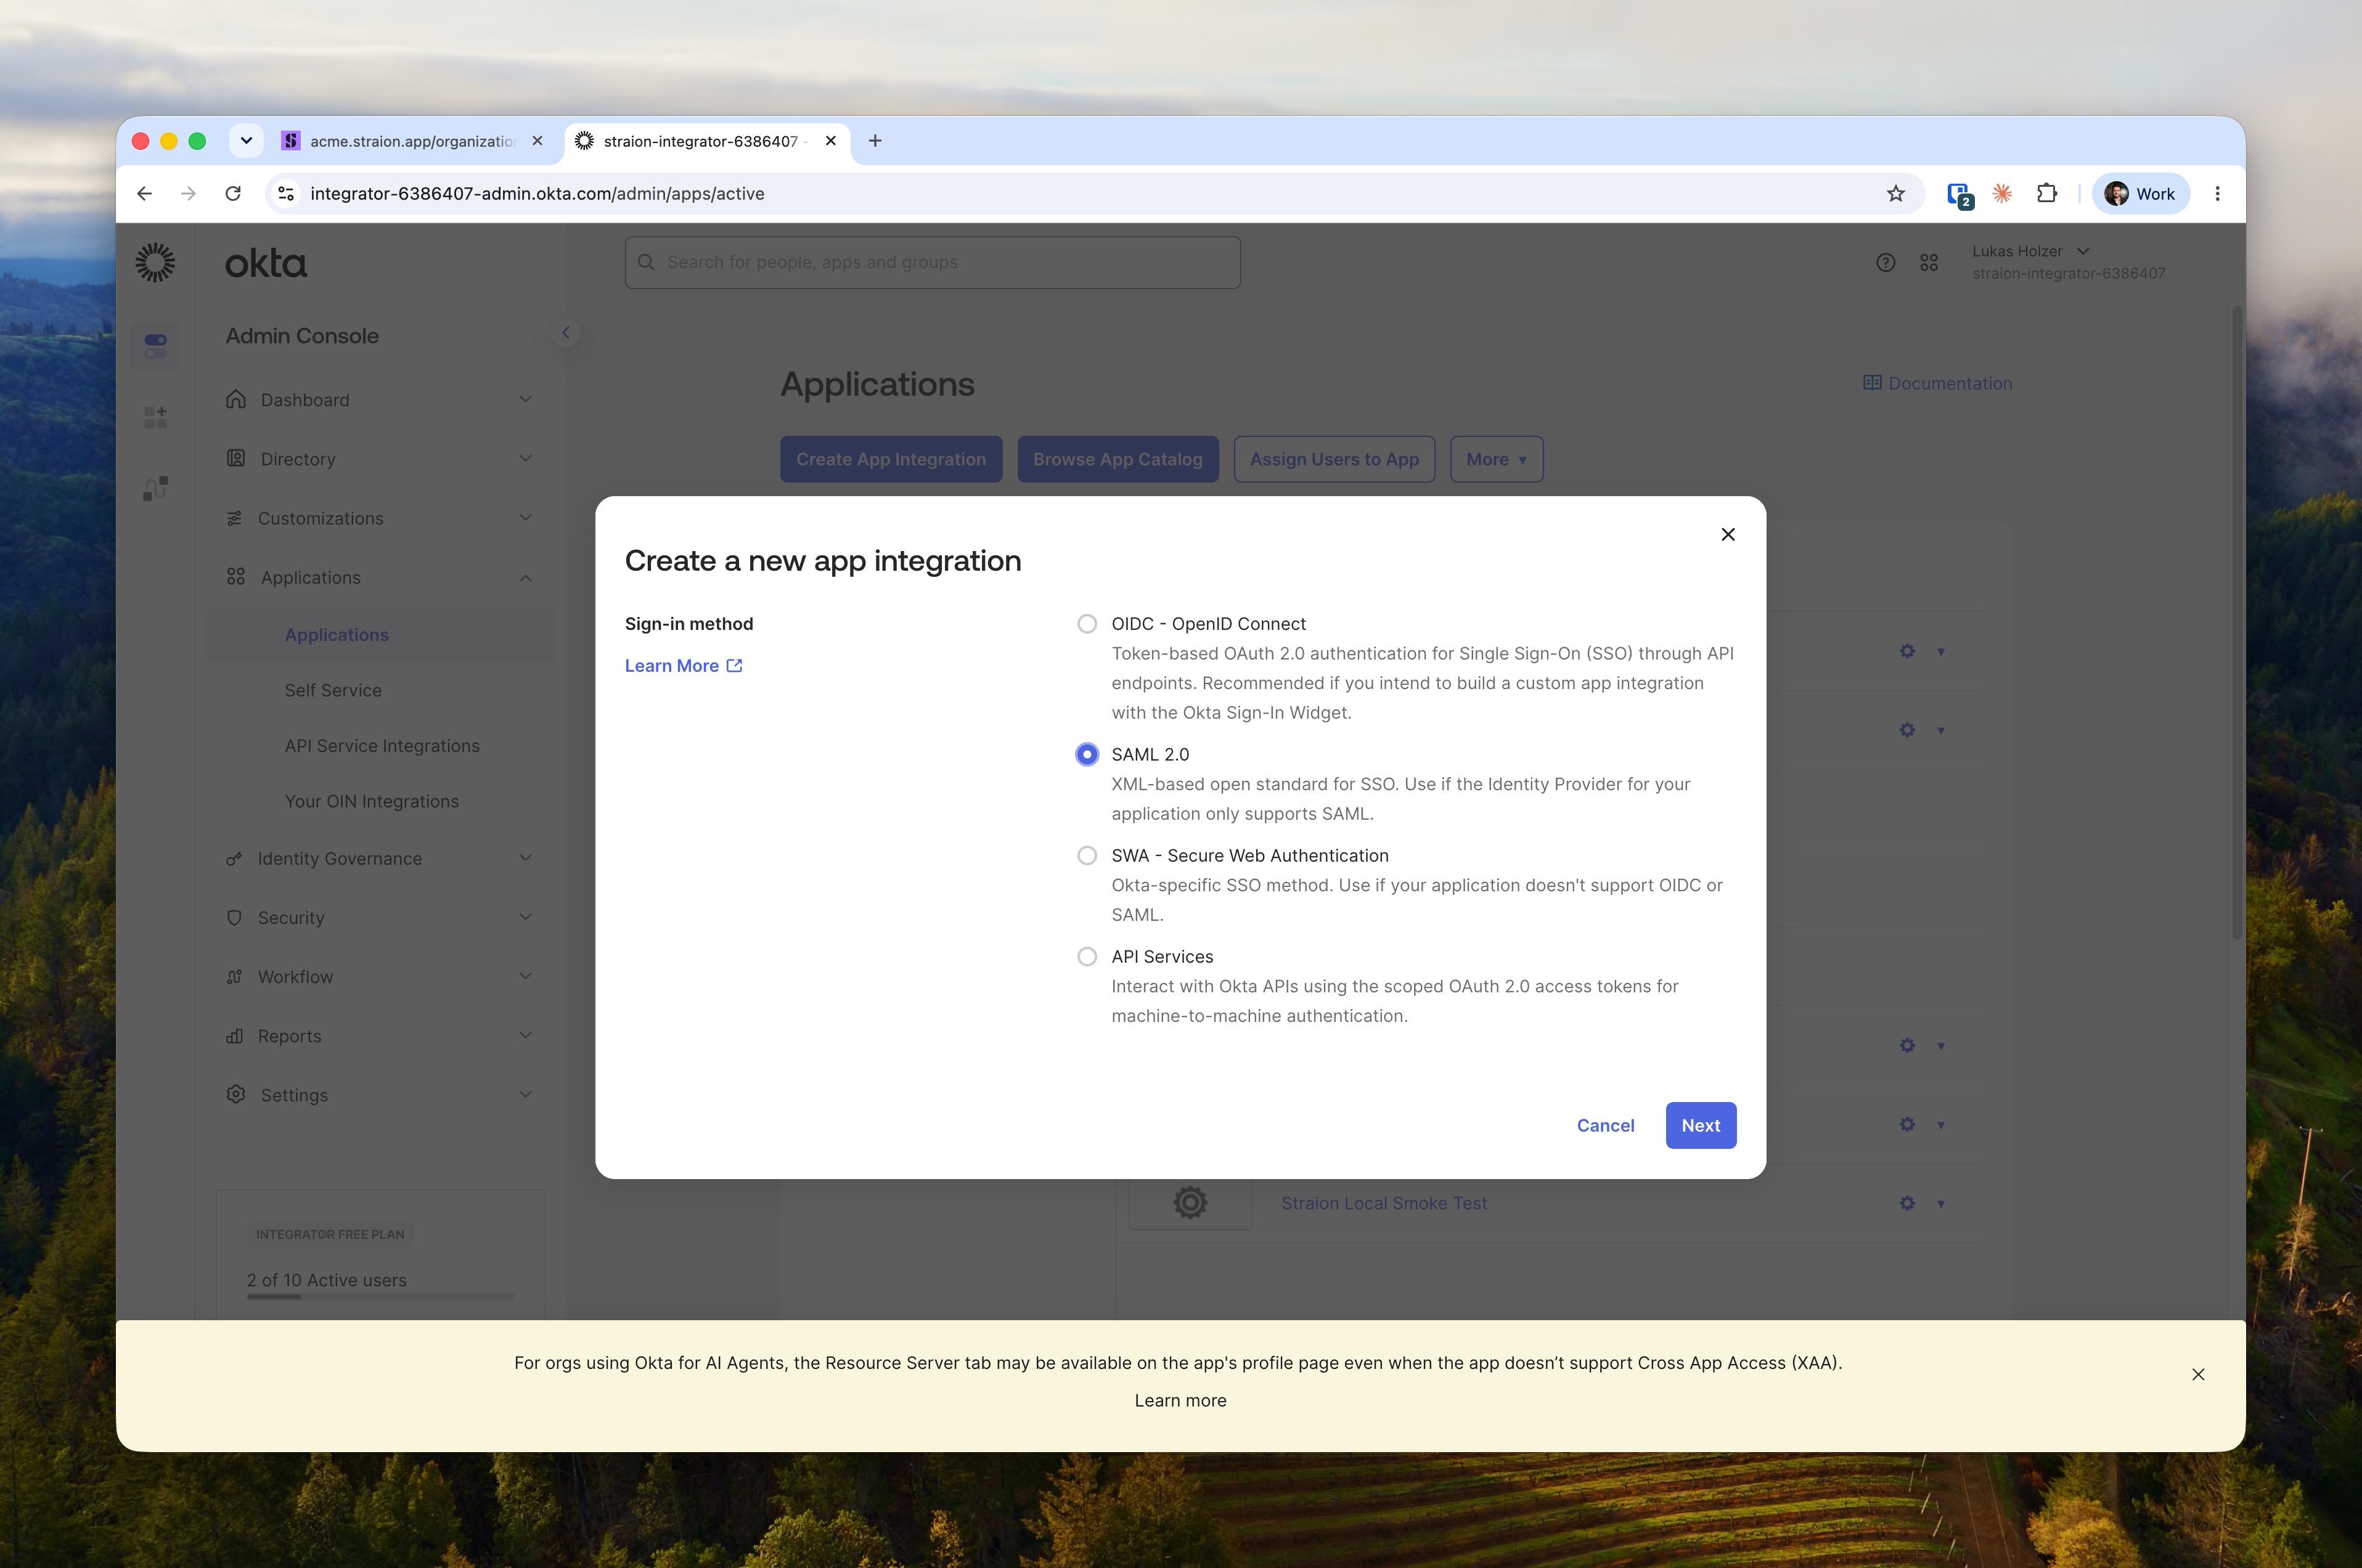
In the Okta Admin Console, go to Applications → Applications → Create App Integration, choose SAML 2.0, and click Next.
Give the app a name (e.g. “Straion”) on the General Settings step and continue.
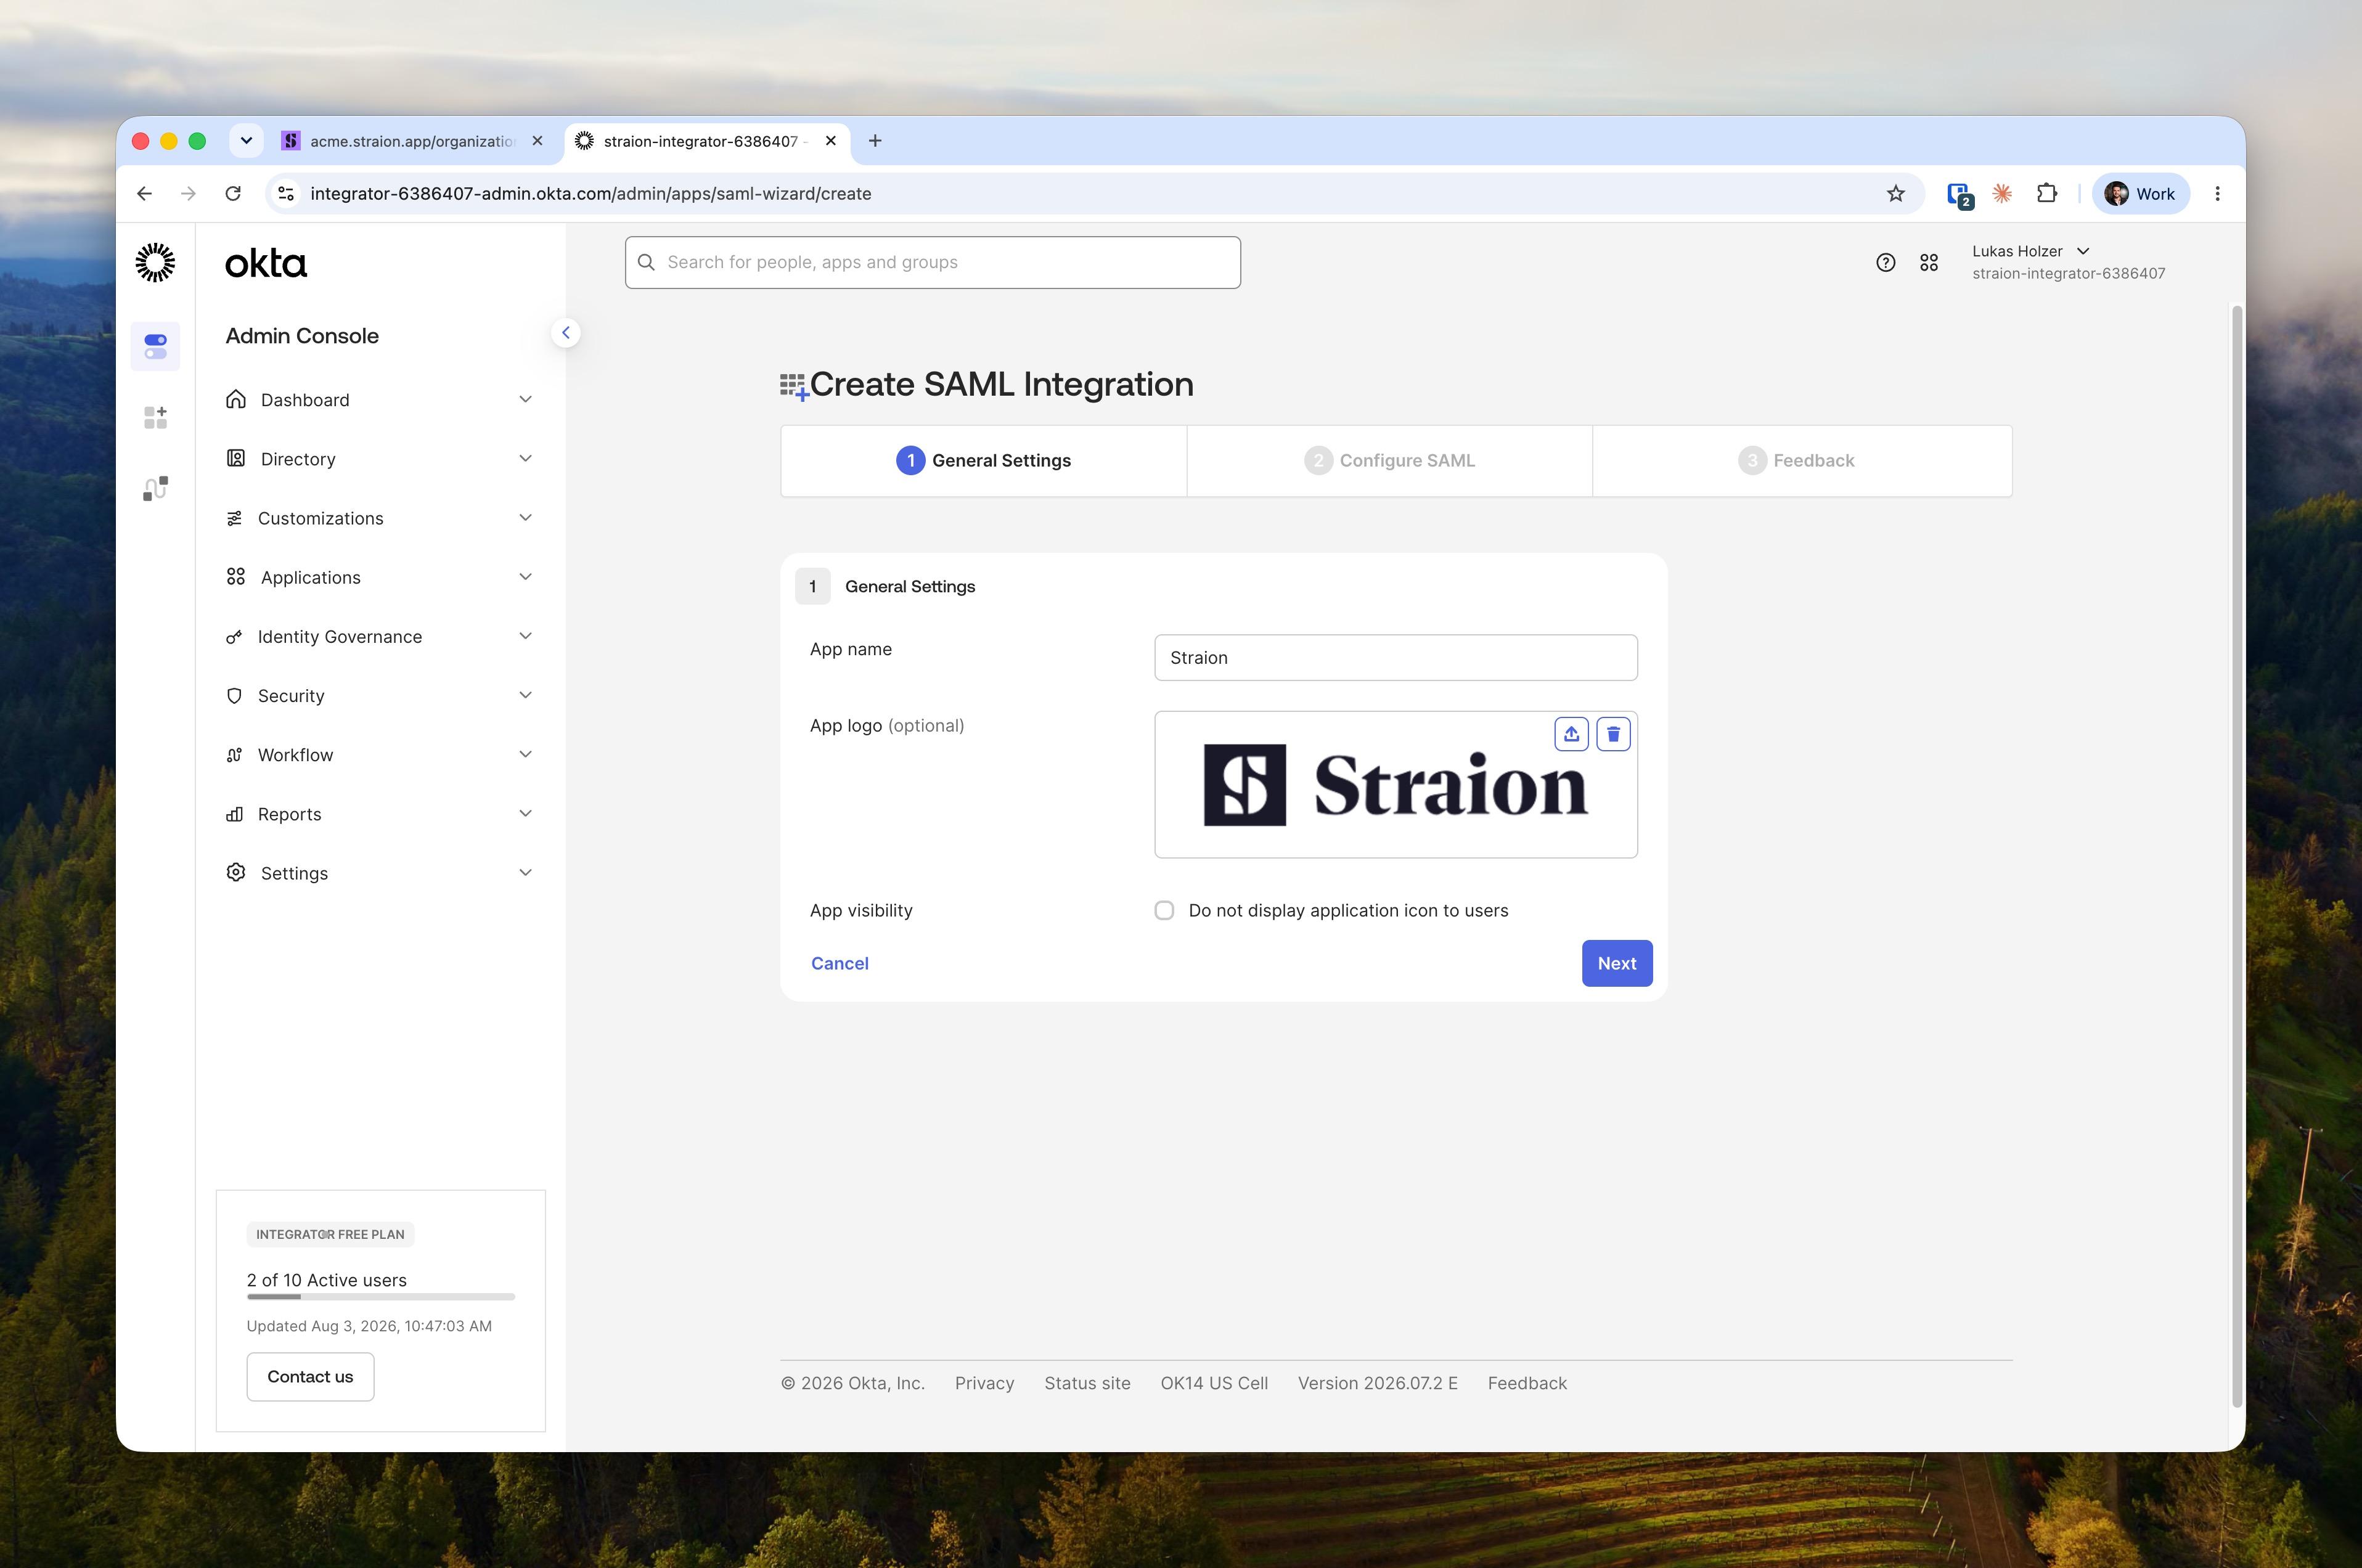
Hit the “Next” button to get to the “Configure SAML” page.
2. Configure SAML
On the Configure SAML step, enter the values from your Identity & provisioning page:
| Okta field | Value |
|---|---|
| Single sign-on URL | Your Single sign-on URL from Straion |
| Audience URI (SP Entity ID) | Your Audience URI from Straion |
| Name ID format | EmailAddress |
| Application username |
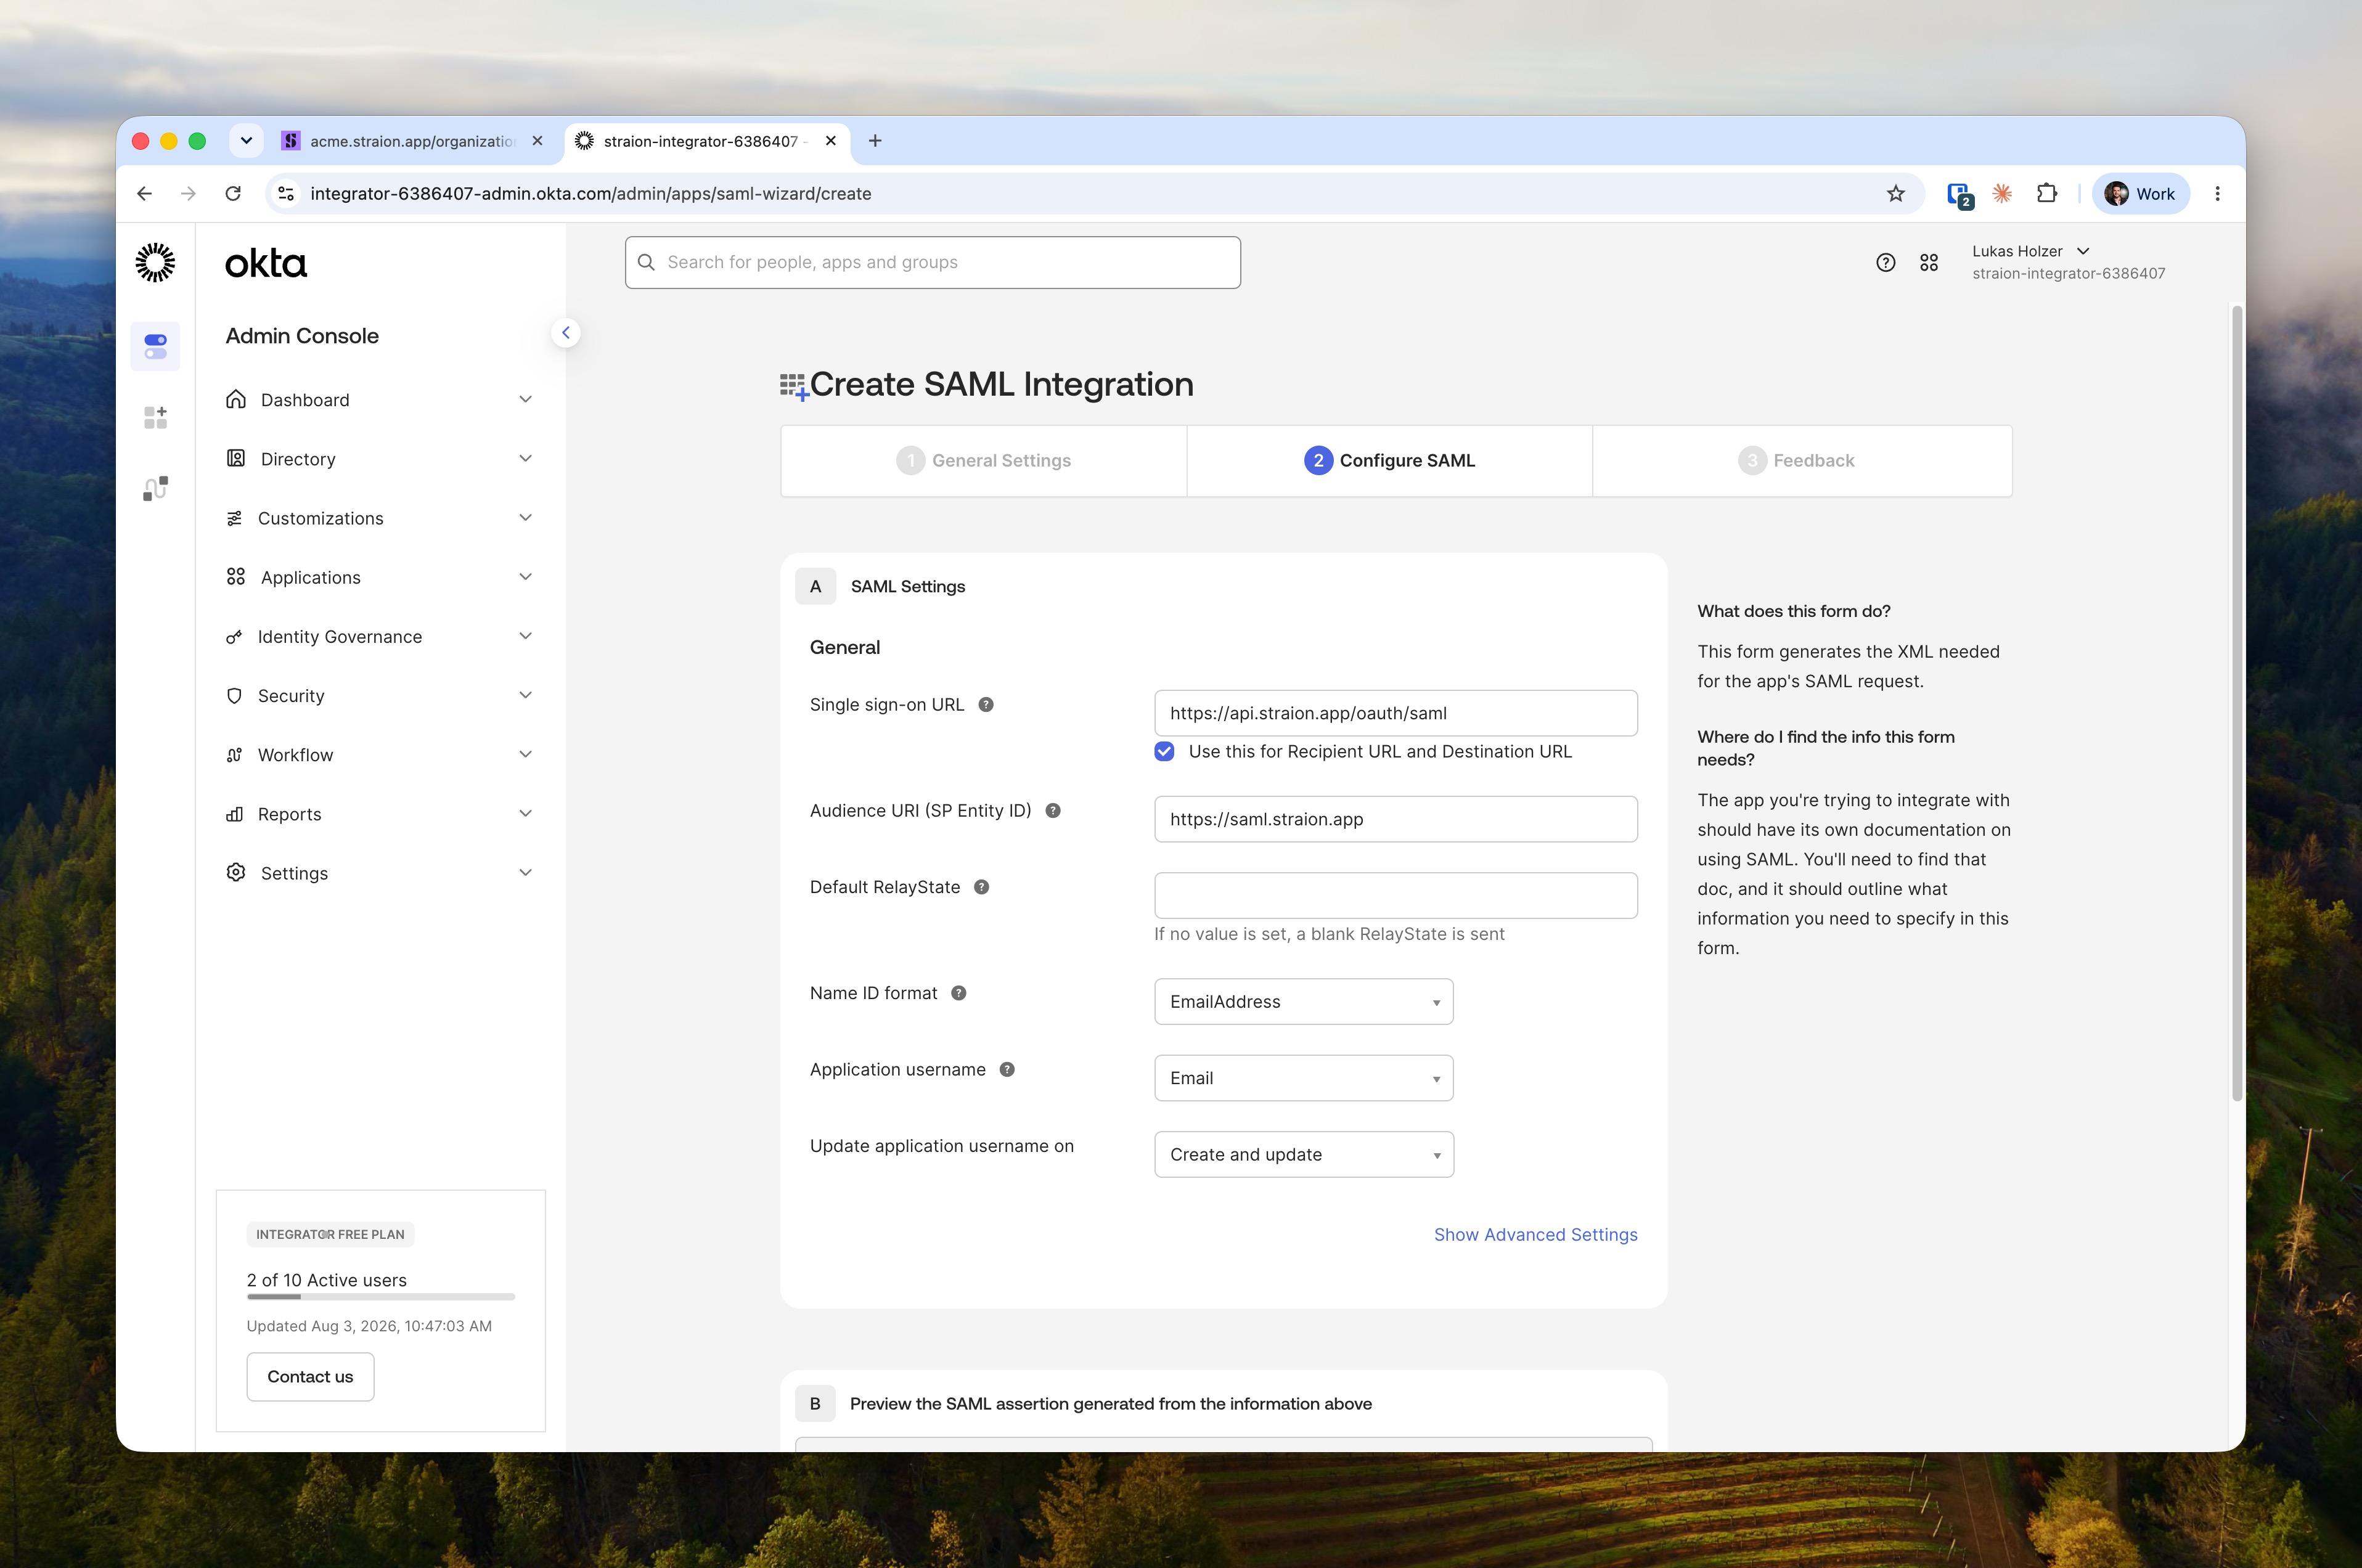
Leave the remaining defaults, finish the wizard, and mark it as an internal app on the Feedback step.
3. Copy the metadata URL and assign users
On the app’s Sign On tab, copy the Metadata URL from the Metadata details section. Then open the Assignments tab and assign the people (or groups) who should be able to log in to Straion.
4. Create the connection in Straion
Back on the Identity & provisioning page, paste the metadata URL into the Metadata URL field. Straion fetches the metadata and fills the Metadata XML field automatically.
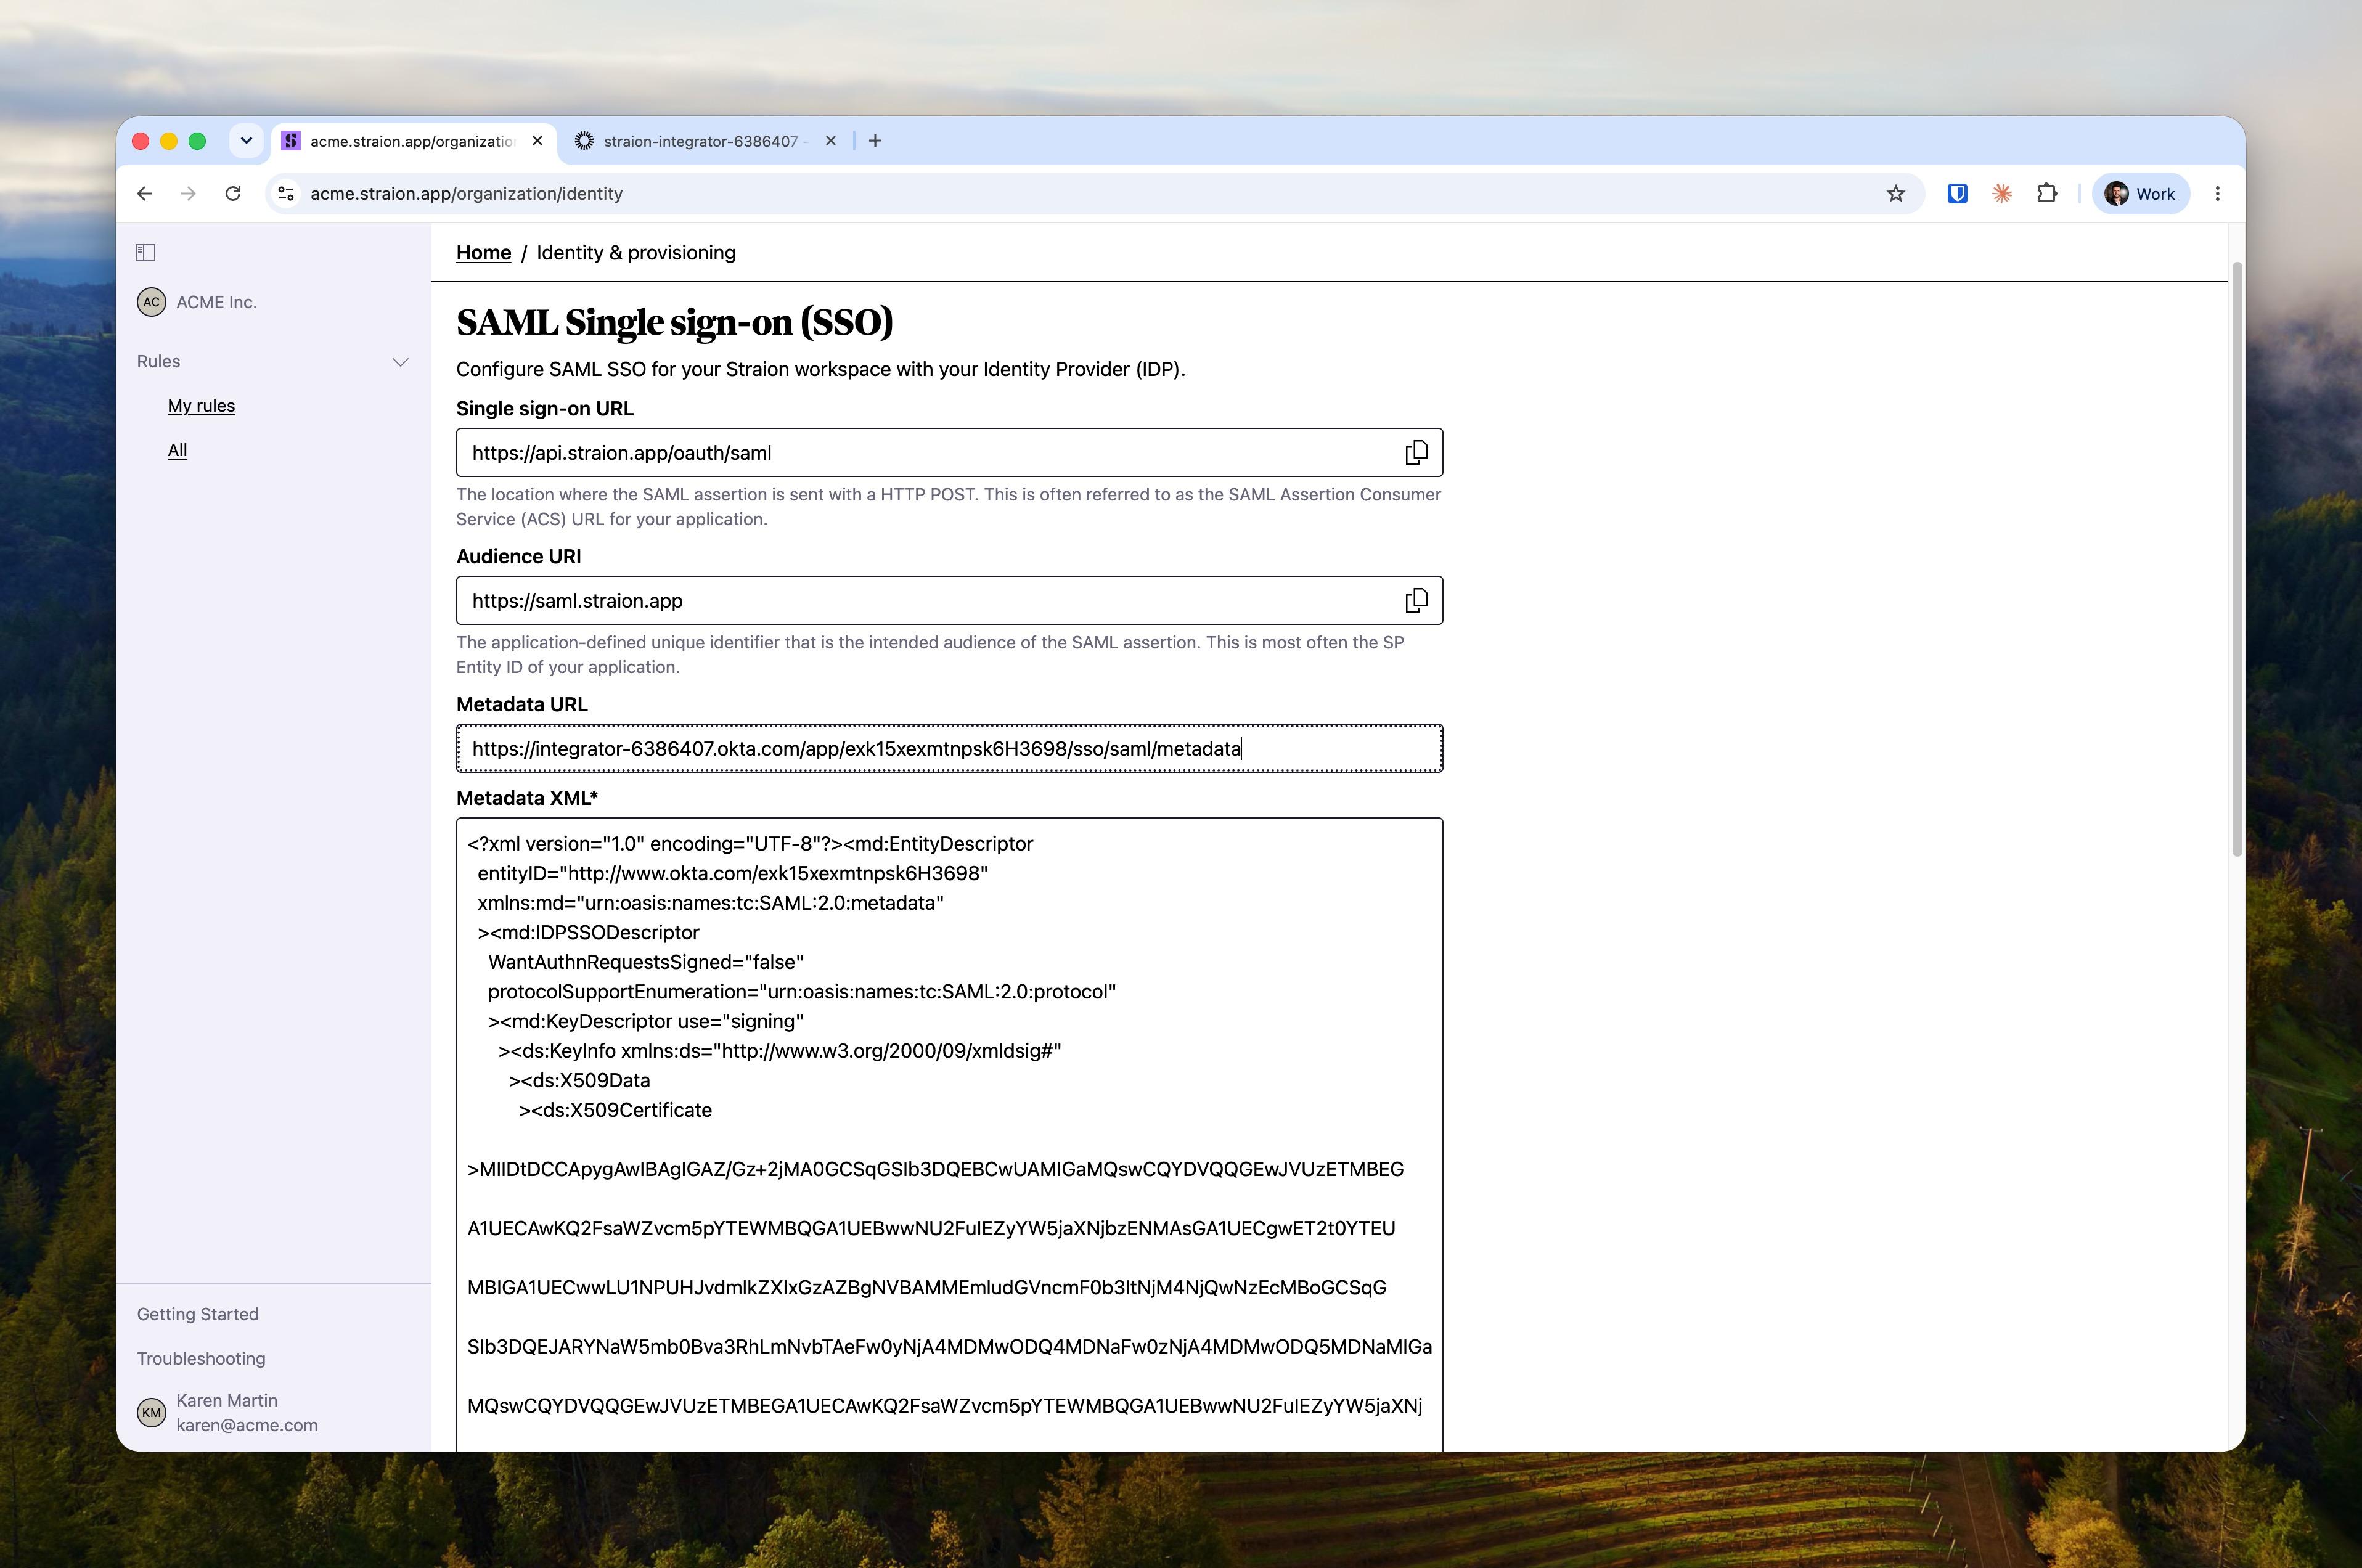
Click Create SAML Connection. The form switches to its connected state — your SSO setup is live.
Microsoft Entra ID (Azure AD)
1. Create the enterprise application
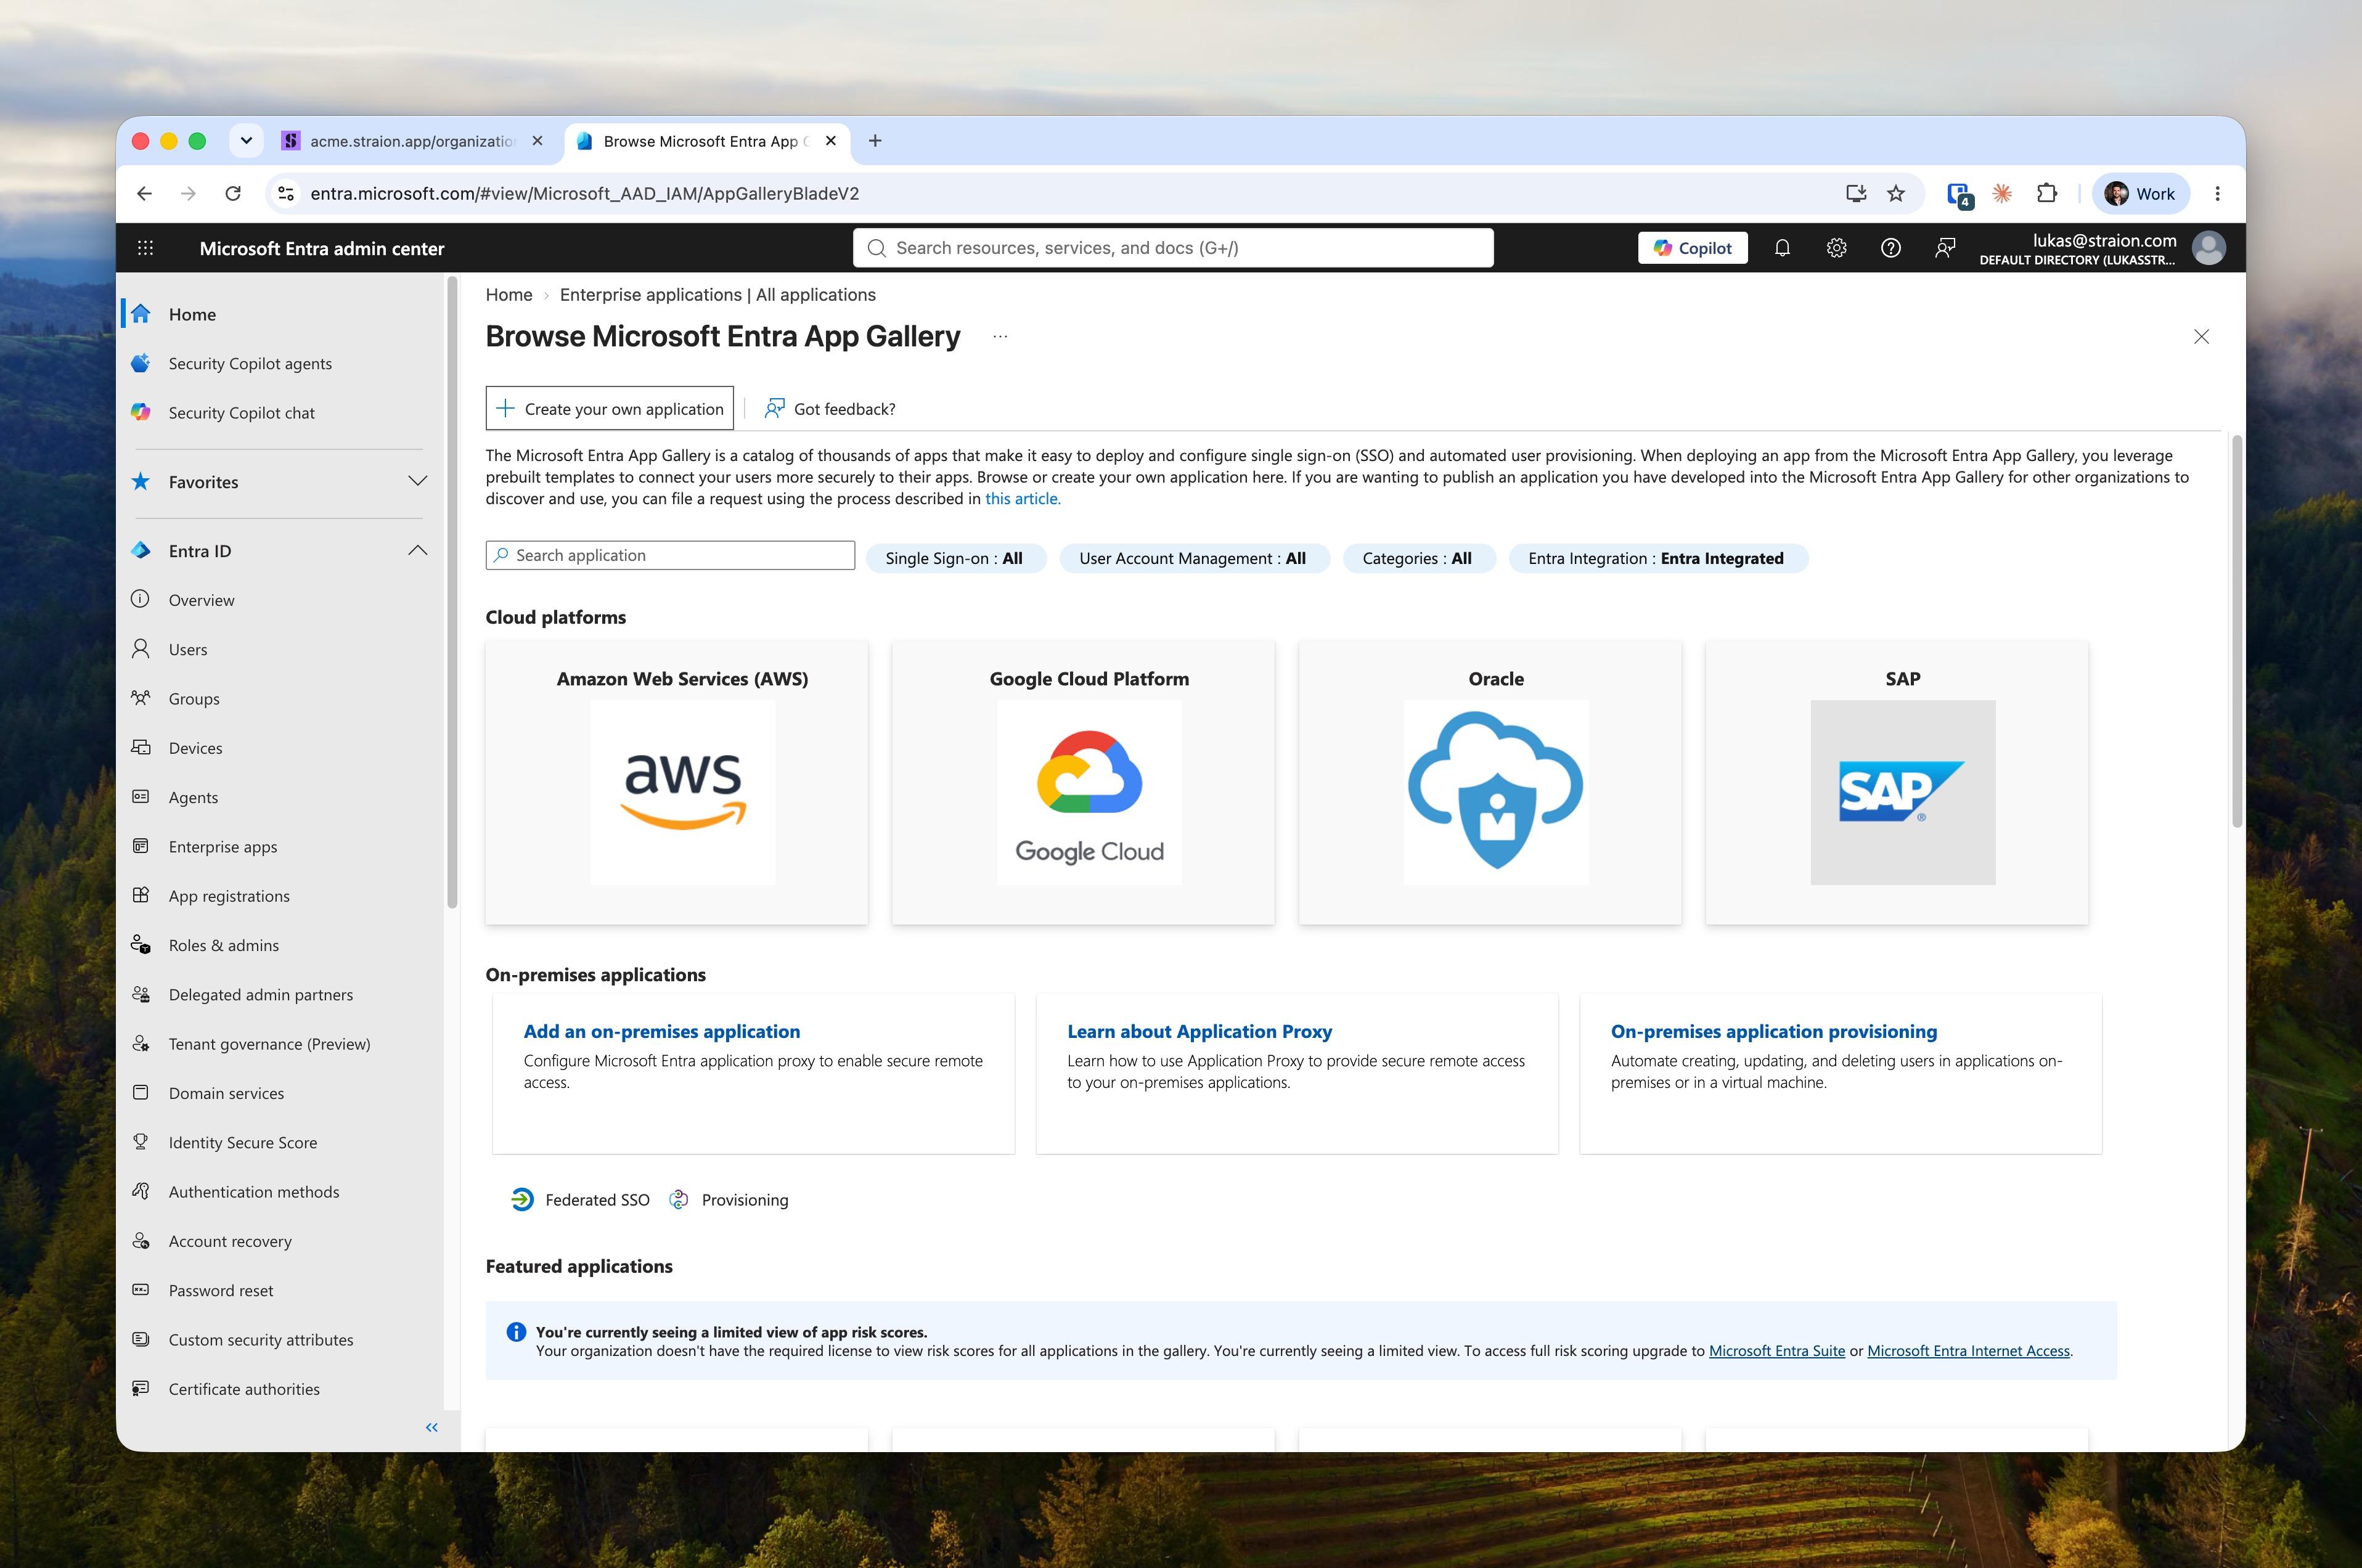
In the Entra admin center, go to Entra ID → Enterprise applications → New application → Create your own application. Name it (e.g. “Straion”), keep “Integrate any other application you don’t find in the gallery (Non-gallery)” selected, and click Create.
2. Choose SAML as the sign-on method
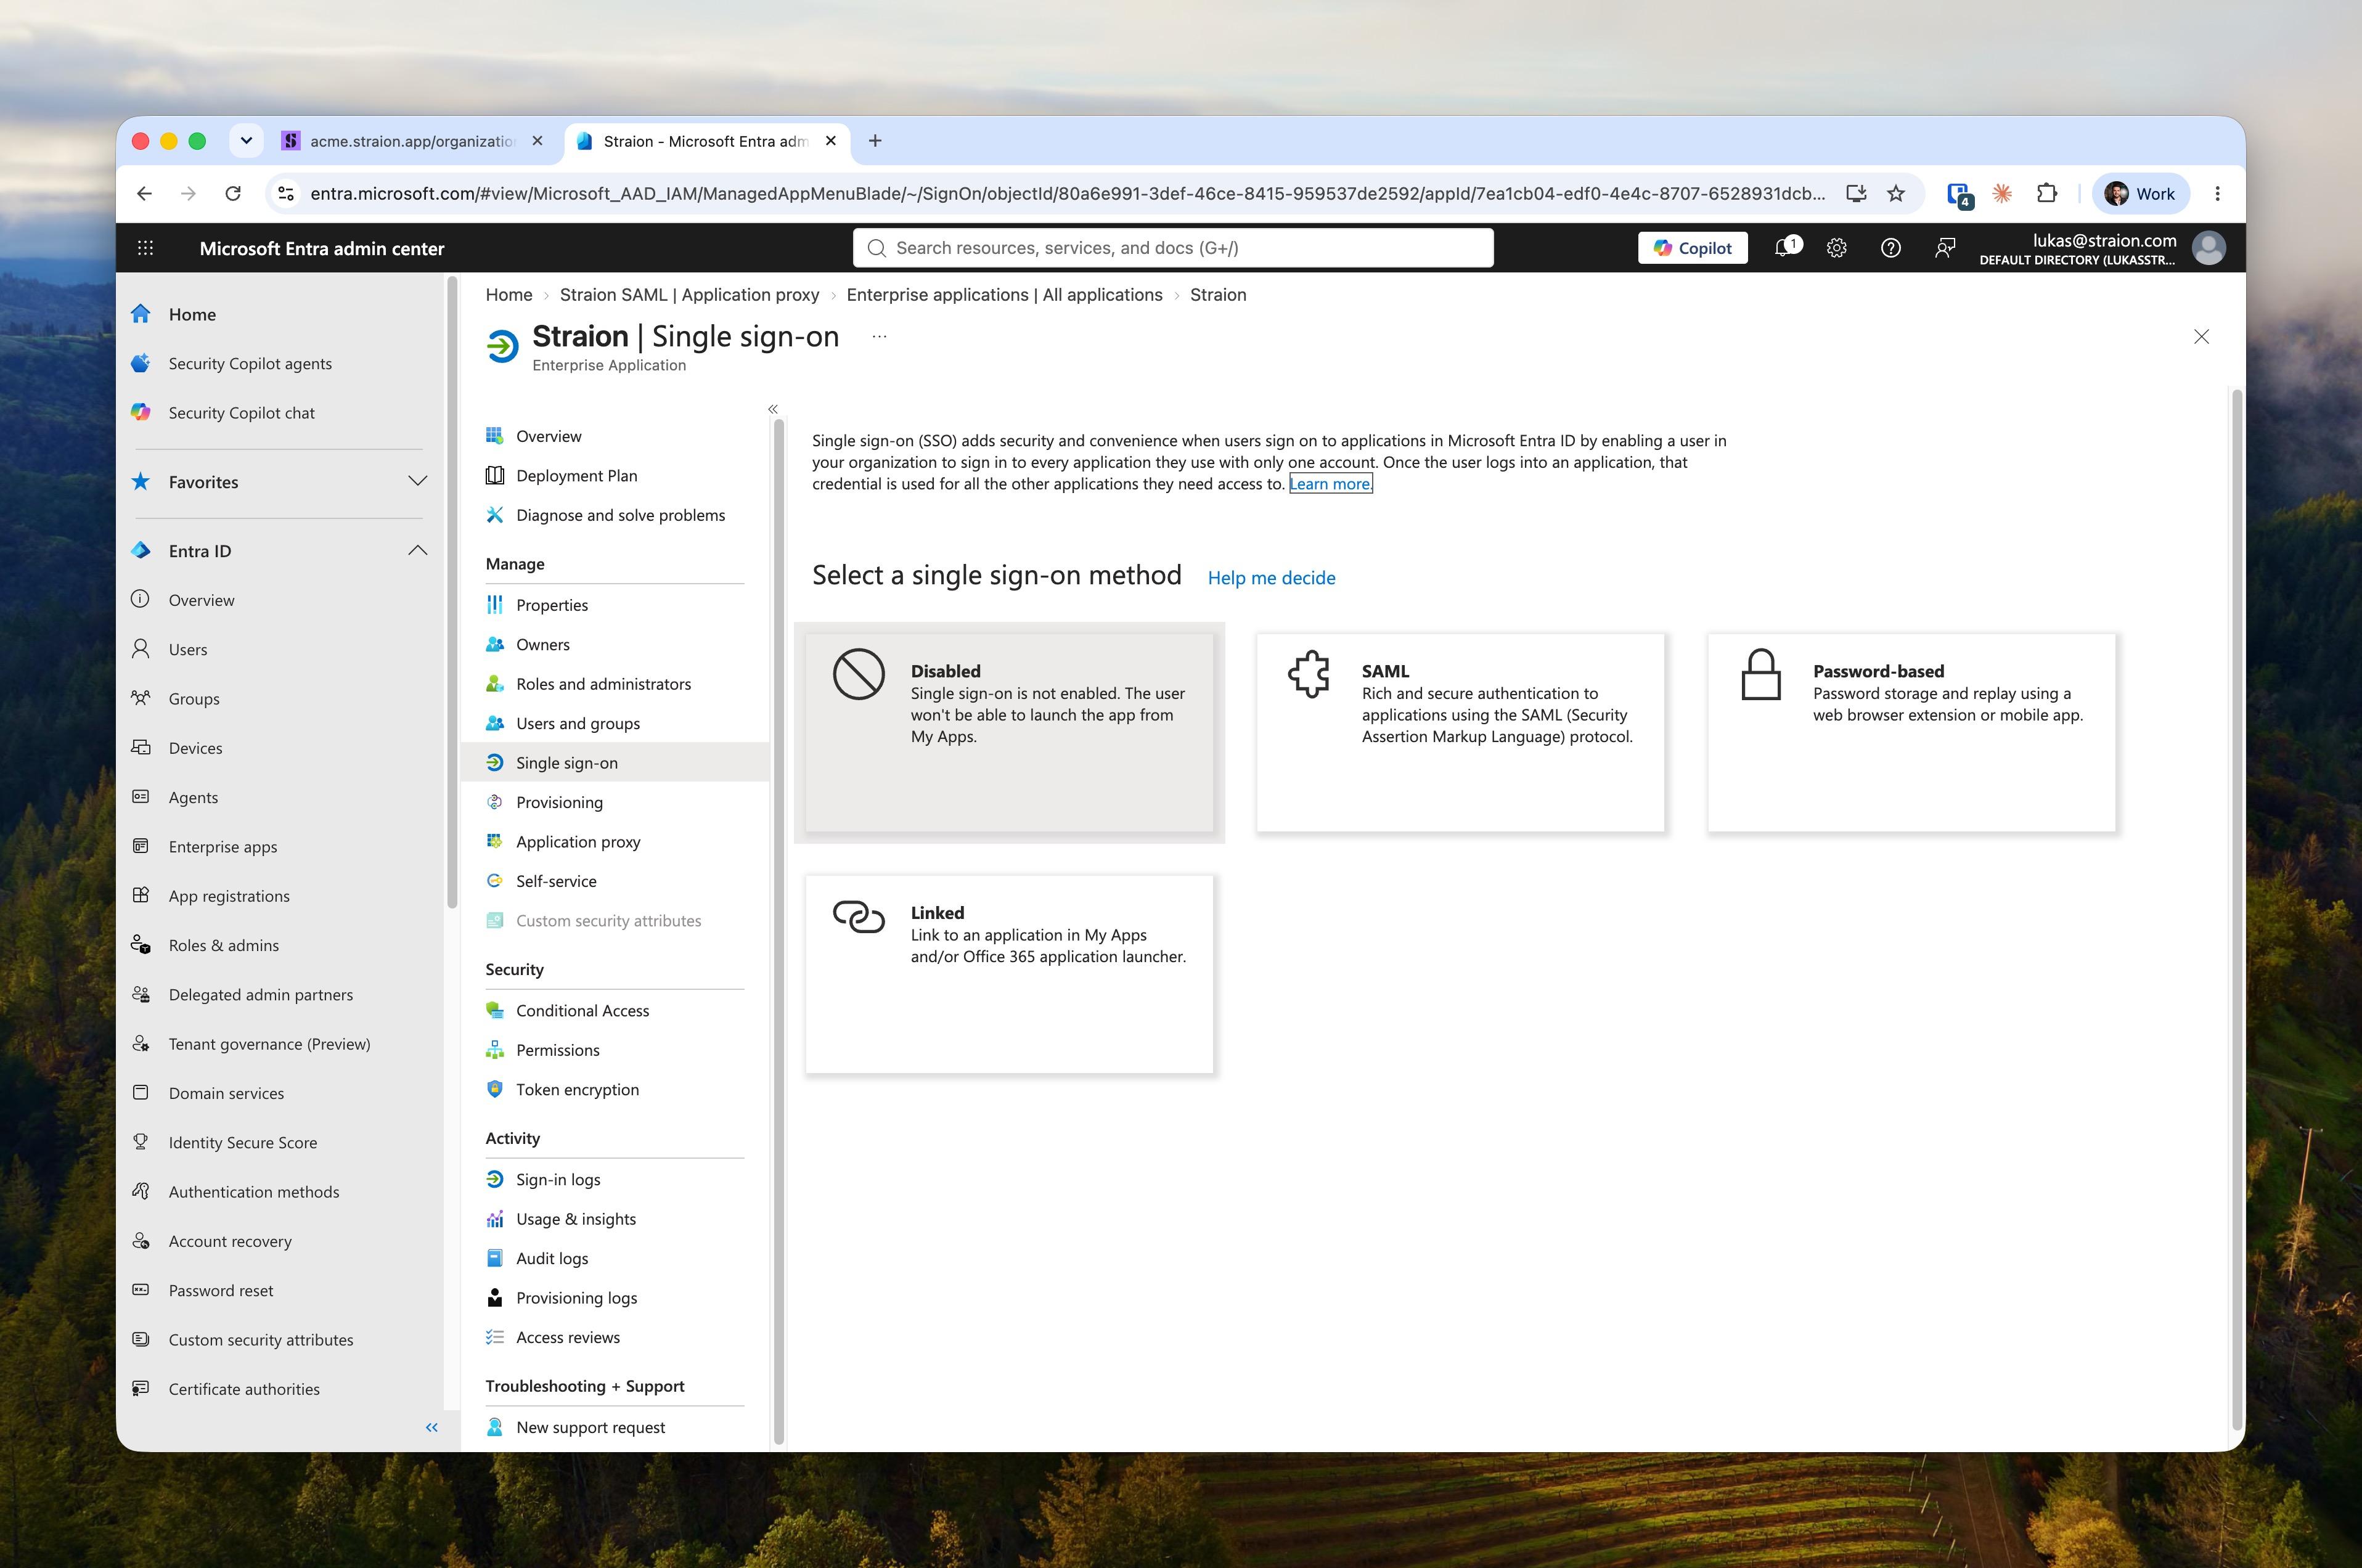
In the new application, open Single sign-on in the left menu and pick the SAML tile.
3. Configure the SAML settings
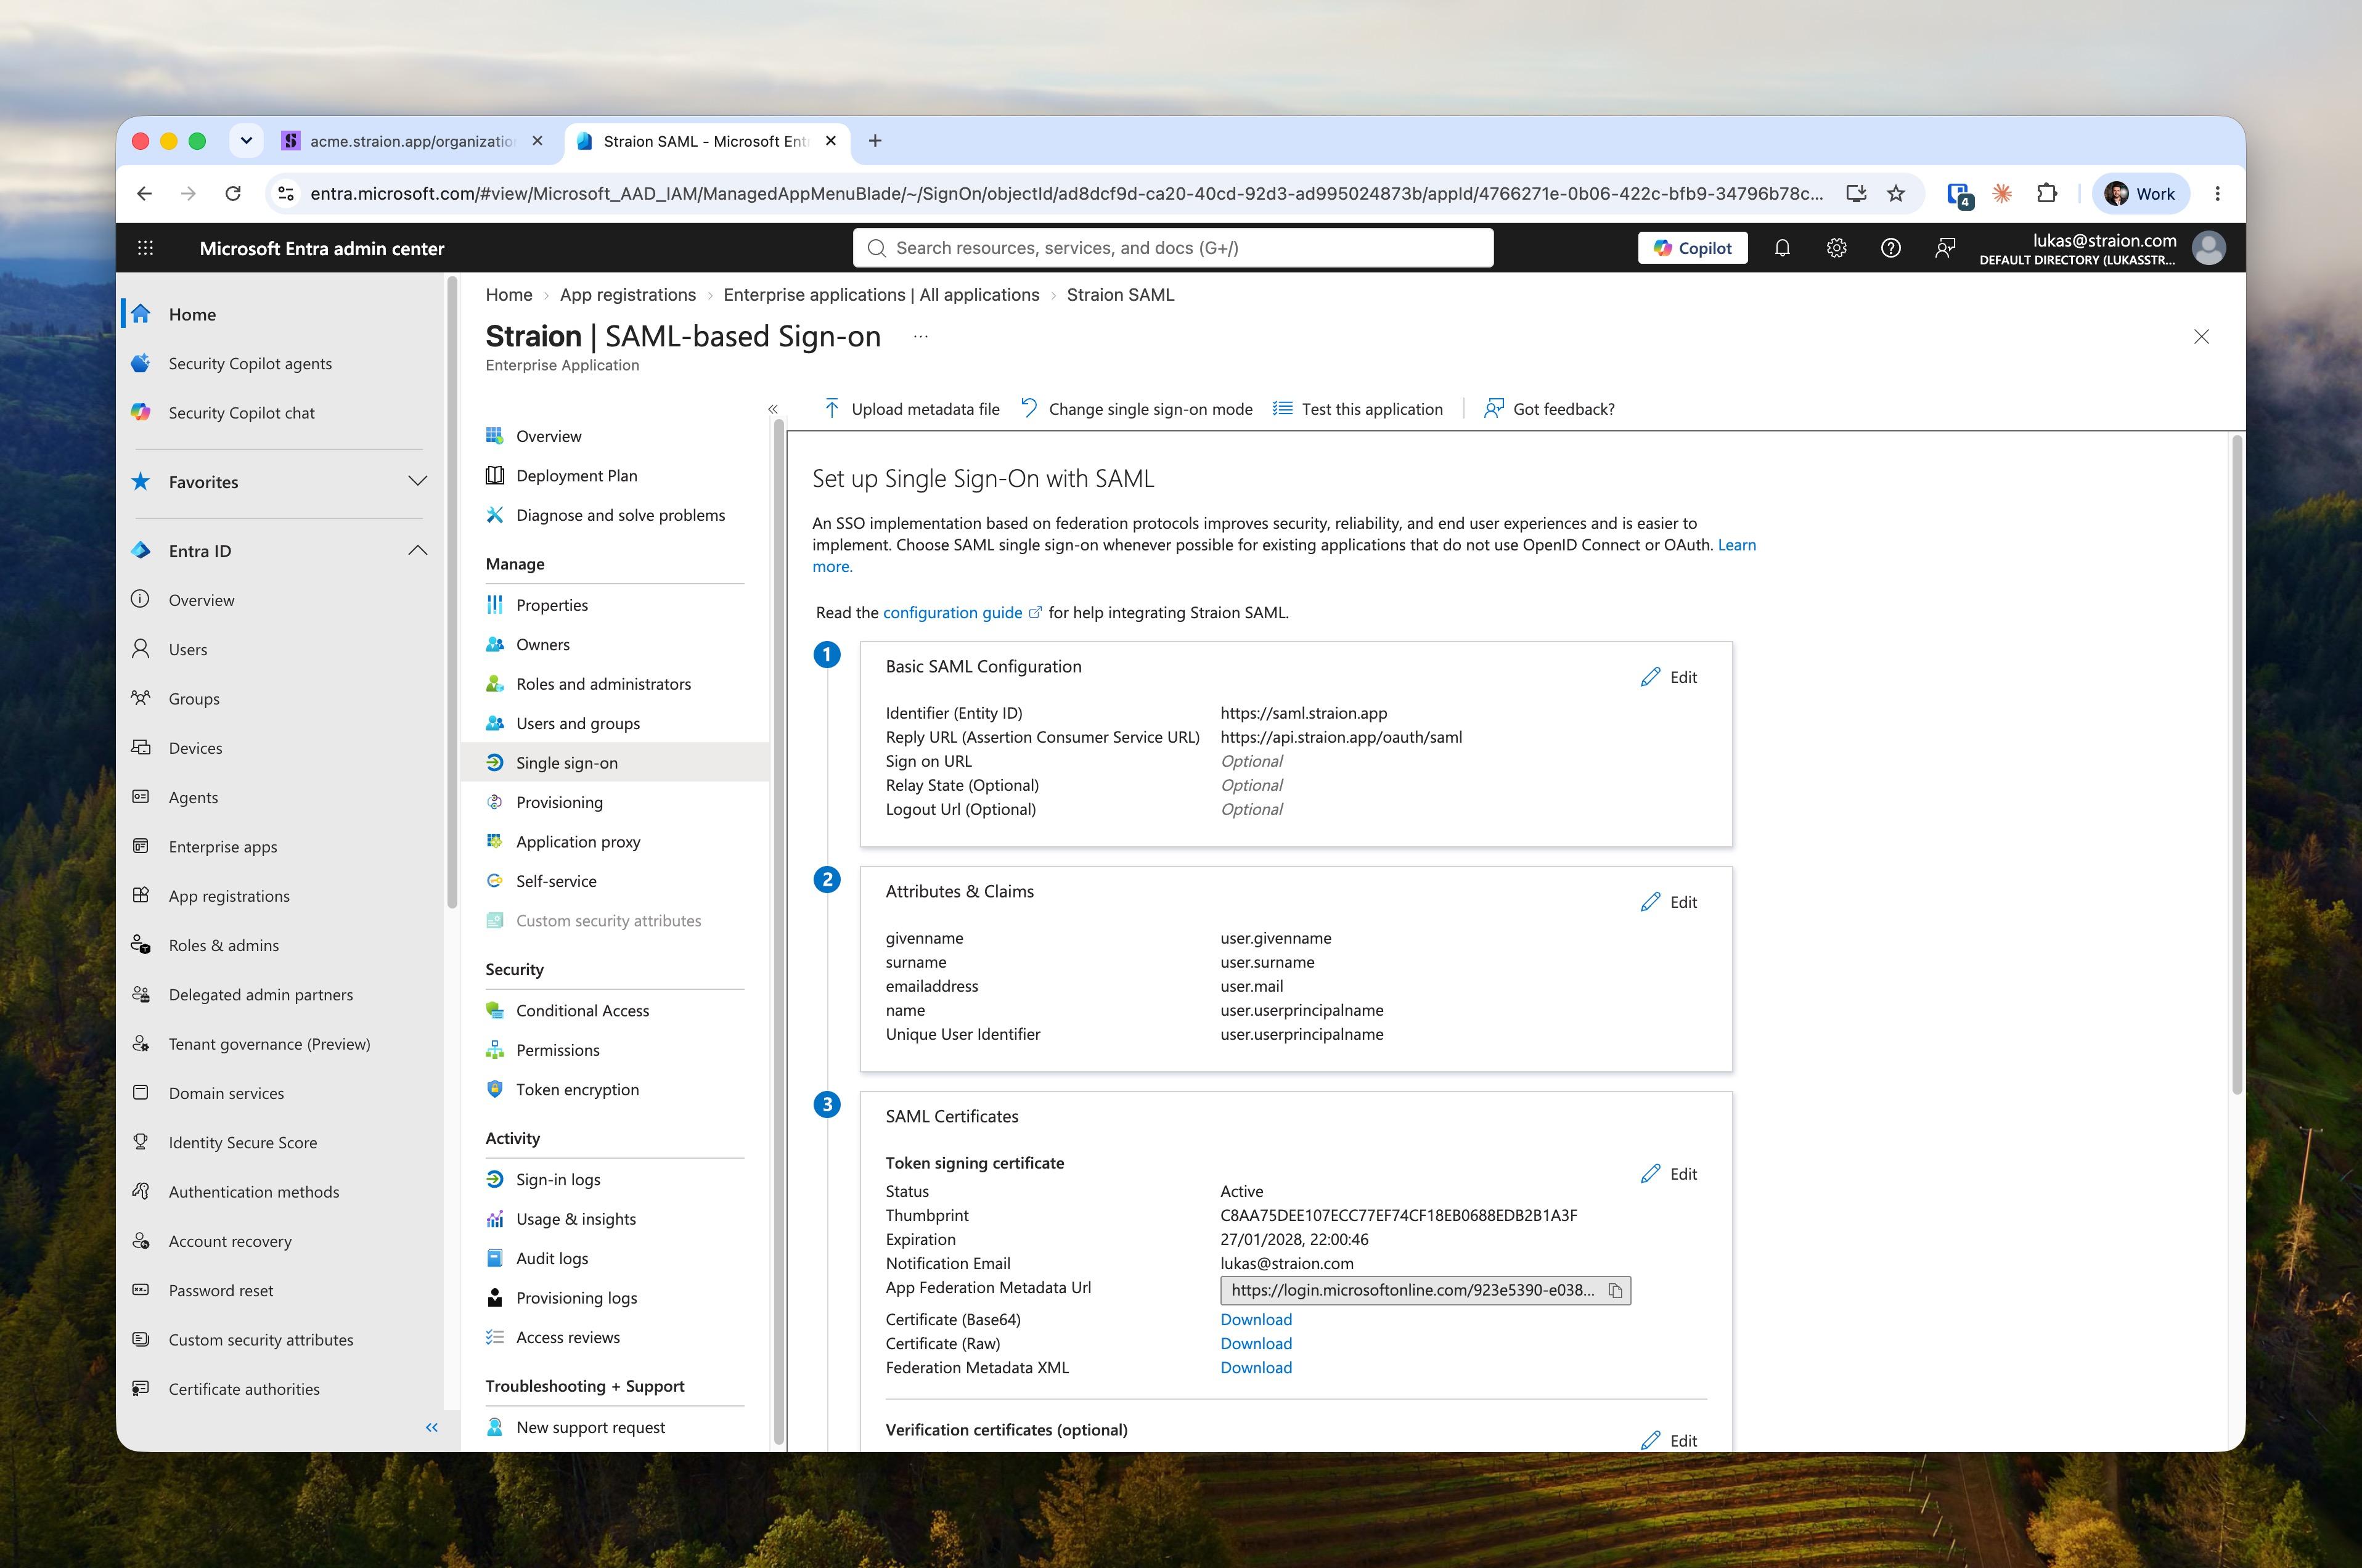
In Basic SAML Configuration, click Edit and enter the values from your Identity & provisioning page:
| Entra field | Value |
|---|---|
| Identifier (Entity ID) | Your Audience URI from Straion |
| Reply URL (Assertion Consumer Service URL) | Your Single sign-on URL from Straion |
Save. In Attributes & Claims, the defaults work when your team’s User Principal Names are their email addresses; if not, set the Unique User Identifier (Name ID) claim to user.mail.
4. Assign users and connect Straion
- In the SAML Certificates section, copy the App Federation Metadata Url — or download the Federation Metadata XML if you prefer pasting the XML directly.
- Under Users and groups, assign the people who should have access. Unassigned users are rejected by Entra at login (Error:
AADSTS50105). - In Straion, paste the metadata URL (or XML) on the Identity & provisioning page and click Create SAML Connection.
OneLogin
- In the OneLogin admin portal, go to Applications → Add App and search for “SAML Custom Connector (Advanced)”.
- On the Configuration tab, enter:
- Audience (EntityID) — your Audience URI from Straion
- ACS (Consumer) URL — your Single sign-on URL from Straion
- ACS (Consumer) URL Validator — the same URL, escaped as a regex (or
.*while testing)
- On the Parameters tab, set NameID value to Email.
- Save, then open More Actions → SAML Metadata to download the metadata XML (or copy the issuer metadata URL from the SSO tab).
- Assign users to the app.
- In Straion, paste the metadata on the Identity & provisioning page and click Create SAML Connection.
Other SAML 2.0 providers
Any SAML 2.0-compliant IdP works. Create a generic SAML application with:
- ACS / Reply / Consumer URL — your Single sign-on URL from Straion
- Audience / SP Entity ID — your Audience URI from Straion
- NameID — the user’s email address (format
emailAddress) - Signed responses — leave assertion/response signing enabled (the default)
Then provide the IdP’s metadata XML or metadata URL to Straion on the Identity & provisioning page.
Tip: Some providers gate their metadata URL behind authentication. If Straion can’t fetch it, download the metadata XML, paste it into the Metadata XML field, and leave the Metadata URL field empty — a filled URL takes precedence over pasted XML.
Logging in with SSO
Once the connection exists, your team has three ways in:
- From the login page — click Continue with SSO / SAML, enter your organization’s subdomain, and click Login with SSO.
- Direct link — share
https://straion.app/auth/sso?subdomain=<your-subdomain>with your team; the subdomain arrives prefilled. - From the IdP dashboard — users click the Straion tile in their IdP portal (e.g. the Okta End-User Dashboard) and land in Straion directly.
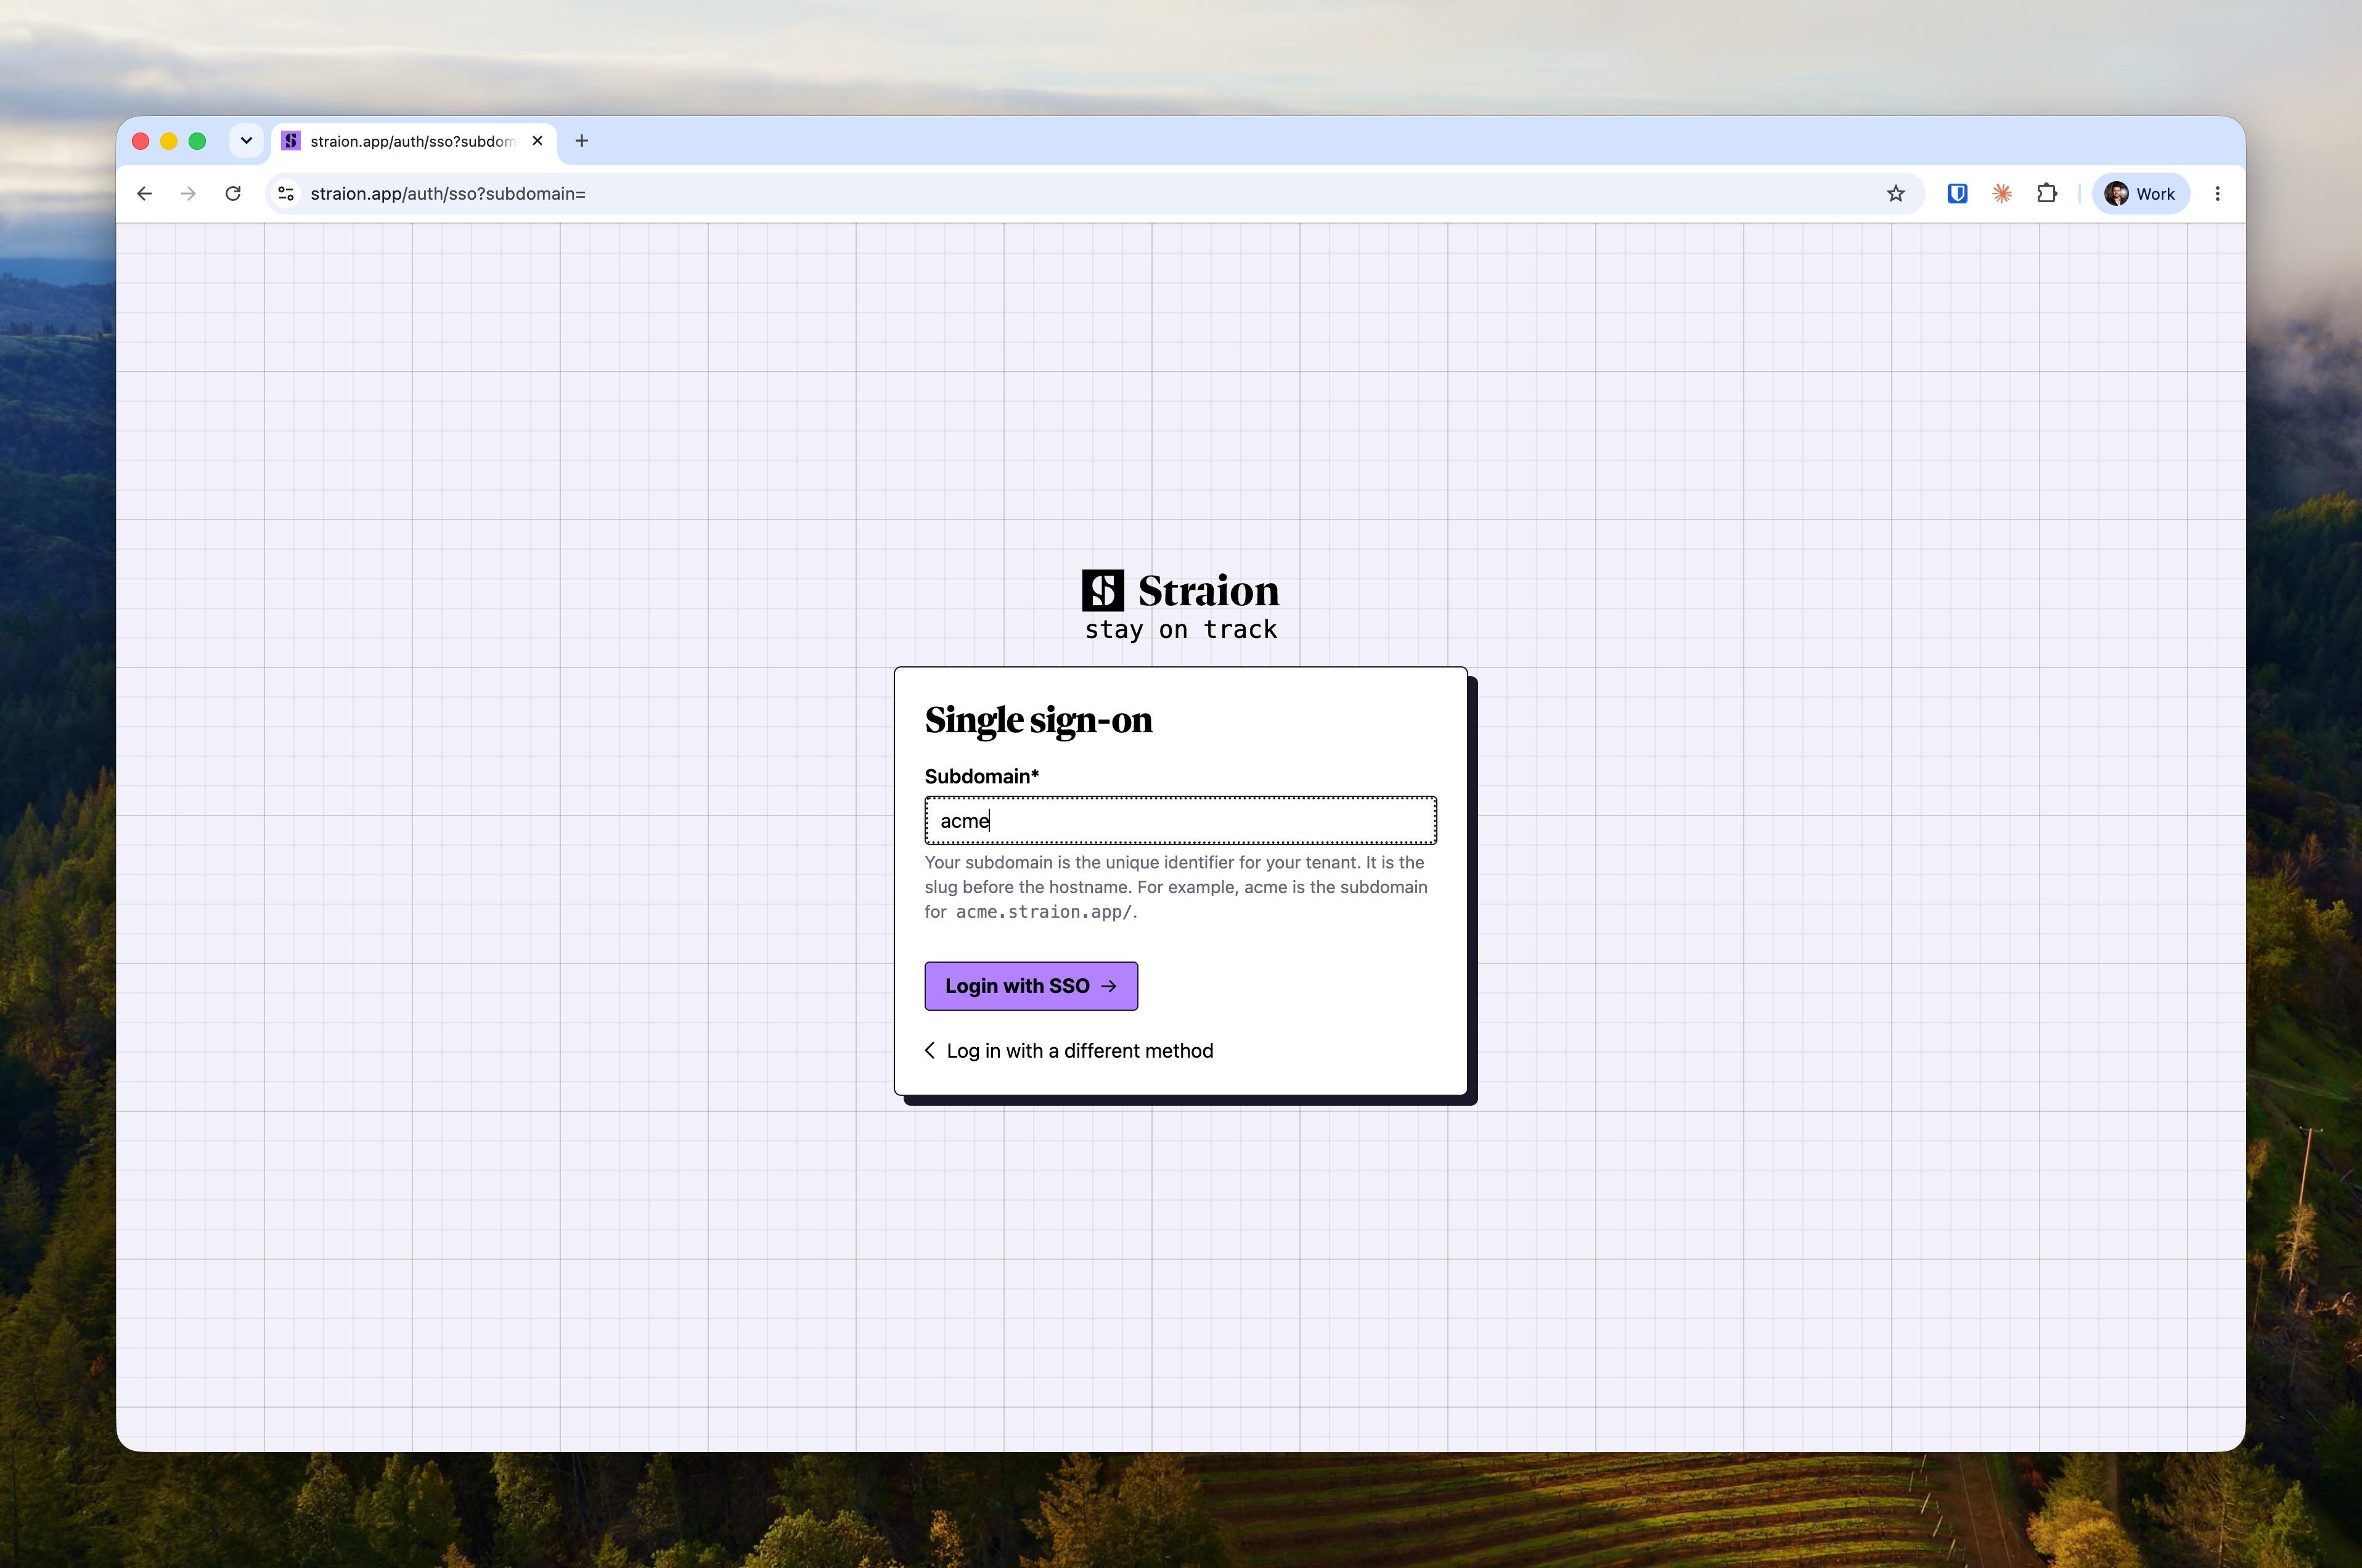
After authenticating with the IdP, users land in your Straion organization — no Straion password involved.
Rotating certificates or changing IdPs
When your IdP rotates its signing certificate or you switch providers, fetch the new metadata and click Update SAML Connection on the Identity & provisioning page. To remove SSO entirely, click Delete SAML Connection — members keep their accounts and fall back to password login, and you can connect a different IdP anytime.
Troubleshooting
Login errors, metadata that won’t parse, and redirect loops are covered in SAML SSO troubleshooting.